On the plus side, I have been able to browse some of my favorite shops and get a few ideas under my tool belt. One of my faves is Anthropologie, which I have mentioned before... even posted pics from their 2011 Christmas dispalys -- Ahhh. Had my daughter not been so enamored by the [very] breakable dishes, I would've stayed around there much longer. Rather than see her rendition of Zorba the Greek and plate throwing, I threw ourselves out of there as soon as she made contact with the displays.
After all the whimsy at Anthro, my next stop was Ikea, where I got my fill of practical living. I have yet to do an entry on Scandinavian decor, which is at the tippy top of my faves design schemes. However, too much 'Ikea' decor is not my thing either. By mixing feminine and vintage pieces with the straight lines and utilitarian style of what they offer is a good way to break things up.
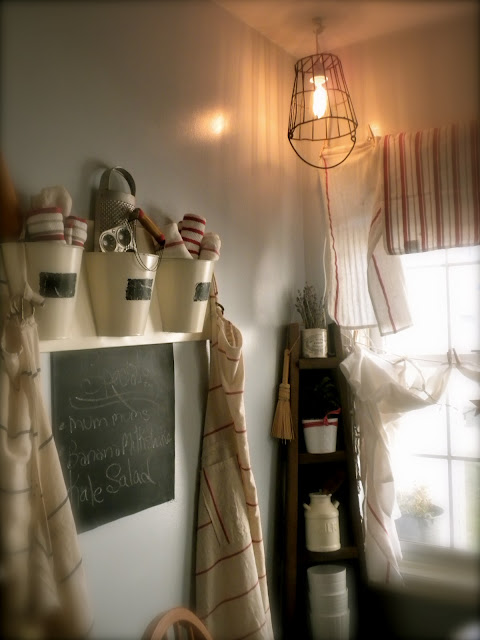
With all this said (apparently I am not at a loss for words), I purchased a $3.99 light fixture. Actually, it was basically a long wire with a socket for a light bulb at the tip and plug on the other end. I decided I would put it into our kitchen, since I'm not crazy about the existing fixtures. Seriously, I've sported the Nigella Lawson/Christmas light look for as long as we've lived there!
My idea worked perfectly! Rather than put the light above the table itself, I opted for the corner where it's easier to hide the wire and allows more reflection of light. I went to Lowe's and purchased a vintage style light bulb and VOILA, there was light. Next was finding a 'lamp shade' for it; I contemplated sacrificing my white colander, but decided to save it for utility instead. I'm happy I did because I then decided to put a metal golf ball holder on top. The basket is a yard sale find from last year that was used for holding plastic shopping bags! So glad I decided to go with this one since it almost adds a farmhouse/industrial feel and a lot of uniqueness to our nook. This is definitely a DIY on the major cheap side!
Check it out! You too can create this yourself, all you need is the following:
- Wire for light (I think mine is three feet)
- Vintage light bulb
- Basket to make it into a pendant light... you can use Ball Jars or colanders as well.


No comments:
Post a Comment