Monday, September 2, 2013

Bookcase Decor

We LOVE books in our house. I'm sure I've mentioned it before, but we are absolutely obsessive over them. I mean, seriously. One of our local libraries gives away old books and sells {some} really good ones for about .25 each. That's right up our alley. The look, the smell, the wear and tear, are all things we go ga-ga over. 


String and pencils create an intellectual feel

Perfect for a book display!

Can finally display this without all the clutter

More of our tree bark pencils

A thrift store find with my own personal touch

I just love book pages
Having said all this, these books tend to, erm, 'collect' over time and may appear a bit hoarder-ish in our little home. Don't get me wrong, it is my belief that you can never have too many books (I shriek as I say this), but seriously, how many books can you stack up in one area before it becomes a hazard to you and your little kiddies?  

A label and stamps creates this whimsy feel

Ta-da..


Anthro-inspired

A collage of stuff at the top


Today, I packed up a bunch of books and moved them to another room. Of course I've merely shifted the issue to another location, but I'll deal with this another time. Perhaps when my kids are off to college in 18 years? 

I can showcase our dictionary with those old-school tabs


There was a haphazard color wheel happening on our bookshelves for a while. There were books that were collecting that were 'shoved' into place. This wasn't going to fly on my radar much longer, so I decided to deal with it. My babies seemed to be on board with my mission, so I just went with it. 


I was completely inspired by a magazine where a woman turned all her books with the bindings facing inward. Yeah, I know. Totally impractical and my husband is going to FREAK when he's looking for a book, but can't actually locate it! However, it looks cool and is a nice change up from what was there before. It also appears much cleaner and streamlined than before and I'm thrilled that I could shift a couple of plants there as well. Happy all-around. 

A plant from my friend finds a suitable home


Letters from Michael's discount section resides in a vase


Wouldn't be complete without those lights


Its all one muted color and I'm digging it... at least for now.


Monday, August 26, 2013

Iced Frothy Chocolate Latte

Coffee makes me smile and what makes me smile even bigger is pretending I'm a barista in my own kitchen. Guilty as charged. When I whip out my apron, I mean serious business. So much so that my kids probably think I'm insane.

I do have a confession: I'm not a coffee drinker; I opt for herbal tea instead. Nor am I really tempted to drink it, however, the thought of my own little cafe - and my husband being addicted to it - is enough to try my hand at making it super duper yummy. The smell, the flavor, the roasted beans, the chalkboard seasonal 'specials' in Starbuck's are all enough to send me over the moon and back.


You see, it all started when I went to Italy years ago. I have vivid memories of sitting at numerous cafe's with my sister and sipping cappuccino's, one right after the other, and being totally satisfied. Its no wonder we would walk for miles on end without feeling one bit tired... now it all makes sense.


Its not about getting a caffeine jolt or getting a 'fix'. Its the experience and I'm all about that, especially when it comes to food. This barista has come up with an awesome recipe for making a plain cup of joe taste worthy enough to be in the category of Italian coffee. Its frothy goodness is so scrumptious that its great on its own, with the foam being good enough to sip a little at a time (you know, while making an obnoxiously loud sipping noise).


Here's a general recipe. Sorry, I didn't really measure precisely; I just threw these in on a whim. After tasting it, though, I knew I had to share it!

Iced Frothy Chocolate Latte

Espresso (I just fill my maker up with espresso and a little water -- at least a couple shots worth)

Ice (LOTS of it, a couple handfuls or however many your blender can tolerate)

1 Cup Milk (I used whole, but you could use whatever. I've also used coconut milk as well)

Two tablespoons Hot Cocoa (or unsweetened cocoa... although this gives it a deeper flavor). For this one, I used a Godiva mix we had in the cupboard. Normally, I'd use cocoa and just sweeten it with sugar.

Brown Sugar (optional, depending on how sweet you like your drink)

Cinnamon (optional)

First I tossed the ice in the blender and then added the cocoa mix. I then poured the espresso in and filled the rest of the blender with milk. Once it turned a milky, creamy color, I blended away. To serve, I put some ice into a glass and put cinnamon on top of the ice (before pouring the drink) and once the latte was in, the cinnamon saturated in the drink. Yumm...


Okay okay, so I'm not a coffee drinker but I did take a sip. It was amazing... and now I have the jitters. I'll leave the coffee drinking to husband since I'll probably be awake until tomorrow night.

Ciao!


Wednesday, August 21, 2013

Kitchen Reveal - I

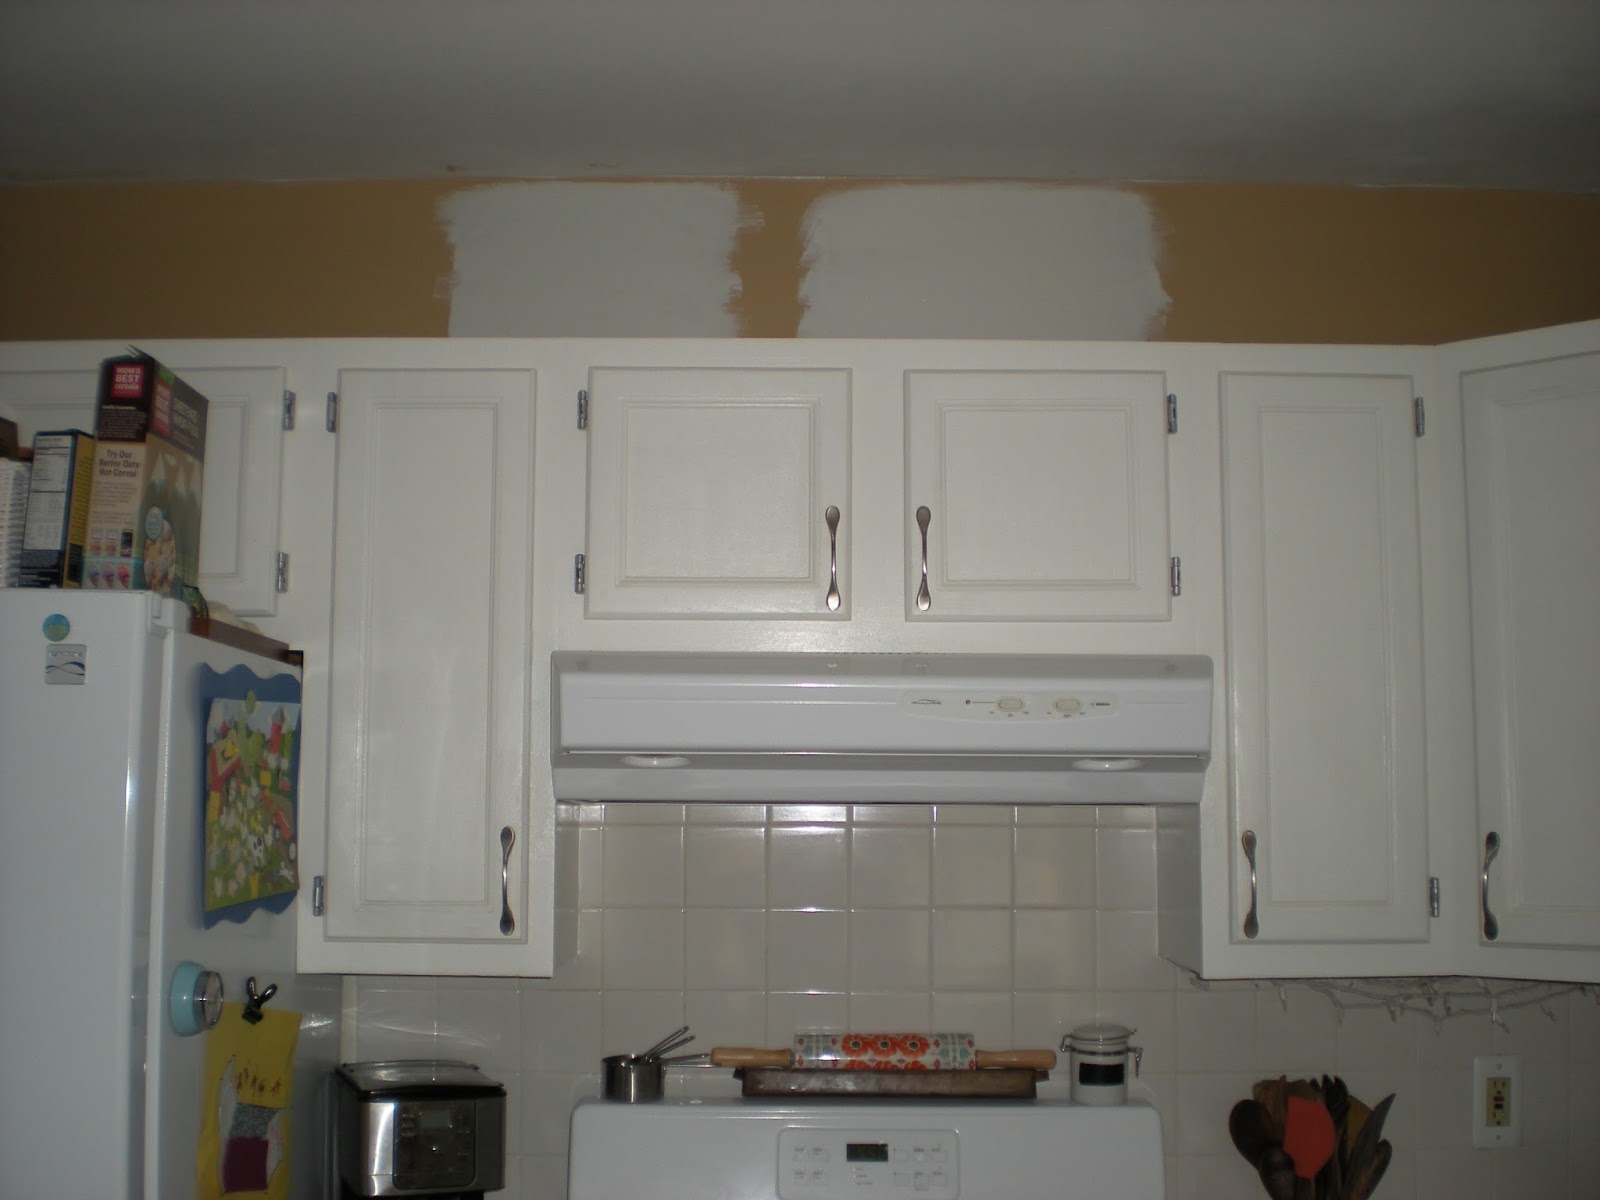
For those of you following my blog, you'll remember I am in the process of overhauling making over our kitchen. Since my last post, I had found a color and husband and I spent a good part of our Sunday painting. He just looooooooooooooved that. 

Having weeded through the 'gray' section of just about every paint swatch known to man, I finally chose a color. I went with Gray Owl by Benjamin Moore. The woman at our local hardware store almost sold me on BM Aura, that is, until I asked the price. All I could think of was the hard budgeting needed to make that happen and to be honest, paint is paint. As long as we were covering up the existing wall color, I didn't care what kind it was. No need for the creme de la creme here. 


Benjamin Moore Gray Owl


Primer is already on there

Satin finish, by the way


 I learned that we could go to Lowe's and have our beloved Gray Owl color-matched. Oh, the joy I felt! So, I did just that. At first it was mixed too dark, then too light, but the third time was a charm and came out perfectly. I found it helpful to arm myself with the BM paint swatch so they could mark the paint on the color once it was mixed. *Note: I'm omitting the part where I finally got the can and walked away, spilling every drop onto the floor, forcing the patient worker from behind the counter to clean it up. I embarrassingly admit that as it lay on the floor, I couldn't help but think what a great color it was.

Don't mind the messy kitchen... 

Since our existing walls were not only darker, but also semi-gloss, it forced us to have to prime those babies. Keep in mind that I had to stick to budget. No budging here. I ended up getting a quart of primer (I forget the brand, but it was at Lowe's and worked fantastic at covering up those walls). Since Gray Owl was also in a quart, the added expense wasn't too big a deal. 


We seriously had to stretch every ounce of each paint can to the best of our abilities. Scraping the inside of the cans with a little paintbrush was not beyond us. In the end, it worked. Because I was going to put up the bead board wallpaper (next post), it made sense to not buy a gallon of paint only to have it left over. I also purchased low-VOC (Olympic brand) paint as it wasn't available in no-VOC... a small price to pay (literally!) for choosing Lowe's over Benjamin Moore. 


I have to say, the color is amazing and even more so against the white cabinets. Its almost like a cloud swooped in and hung around long enough to make you go 'ahhhhhhh'. Soft. Like the feel of cashmere against your skin. I can't quite describe the feeling of the room now, but there is such a difference from what it was like before. Needless to say, I love being in the kitchen even more now.


Friday, August 9, 2013

oil cleansing method

When I was preggers with my daughter, I became very conscious of what I was putting on my body. Usually a new mom worries about what she puts into her body, but since I ate well (and my cravings were all over the junk food map!) I shifted my focus onto beauty products.

Holding my squirmy 8-month old here, which is why I look funny!
I soon discovered that the stuff I was washing my face with were not only toxic, but also unnecessary. You know when you know these things in the back of your mind, but you gravitate towards the pretty little packing and advertising claims anyway? That was me.. Yep. Didn't help that I worked for a magazine that had blow-out sales twice a year and I scored high-end (ie, ridiculously expensive) products for only a few bucks. Seriously, I packed in closets full of beauty potions.

This is my beauty arsenal and all I use on my face.

FAST-forward four years and I'm still on this kick. Except now we're on a one-income salary and it just doesn't pay to spend money on, erm, 'incidentals'(?) Since my obsession second home is Pinterest, I've discovered a great and healthy cleansing method that costs very little money and it has given me super glowy, dewy and clear skin (I can go on and on). 

What is it?
OCM. That's right. Just three letters crunched together to sound like a cable channel. Maybe it is, but I've definitely tuned in. It stands for Oil Cleansing Method and I'm in love. I've 'Youtubed' this and even read various testimonies on it. Women love this. So, I too, have jumped on the bandwagon to Great Skinville. 

How on earth do I wash my skin with oil? 
Easy peasy. Simply put a nickel-sized drop of oil between your palms, rub your hands together and massage onto your face. *I keep my skin dry for this part.* Once I've got it all on, I moisten a washcloth with warm/hot water and stretch it out over my face so it 'steams' my skin. I leave it there for a minute or so and continue to do this a few more times until I feel the oil has penetrated. I then continue to rinse the washcloth with warm water and exfoliate in circular motions. This is very relaxing! However, most nights I'm just scrambling to get myself - and kiddies - to bed that I totally miss out on that.

Do I wash morning and night?
Depends. Sometimes I'm too busy to wash my face in the morning and I just do it at night.. you know, to 'wash the day away'. I find it also saves on resources and since your skin doesn't get terribly dirty from night to morning, I think its fine.

Is it capable of removing makeup? 
Honestly, I don't usually wear makeup, so I'm not an authority to say. However, I have worn HEAVY DUTY organic sunscreen that turns my skin kabuki-white, and seriously doesn't budge AT ALL, and I haven't experienced a problem with taking it off. You just have to put the washcloth to your face and rinse it more times, but it eventually does come off. Makeup is much easier to dissolve!

What oil do I use?
I use Castor oil because its good with removing impurities from your skin. I've also used olive oil and coconut oil and liked those as well. Its all about preference and what works for you. I would just steer clear of lower quality oils since it is your face and you don't want to sacrifice quality for quantity. Trust me, the stuff lasts a long time since your only using a little bit and its much cheaper in the long-run than buying face wash!

What do I use after washing?
I put a drop of Moroccan Argan oil onto my face and rub it in while its semi-dry. I find when my skin is still a little wet it seeps in better. I love how it moisturizes and keeps my skin dewy. Plus, its Fair Trade, so its good not only for me, but the workers who harvest it. I don't use any creams or moisturizers and I'll always opt for oil even when I'm in a pinch. Heck, I even moisturize our babies delicate skin with almond oil!

So that's it. Beauty routine in a nutshell, nature's "pretty little packaging"!


Sunday, July 28, 2013

Pizza Caballo

When my dad came back from South America a couple weeks ago, he told me we just haaaaaaaad to make pizza with faina. Pizza who? After looking it up and doing my 'research', I've learned that this pizza is also dubbed 'Caballo', meaning "on horseback" and its the topping of choice in Argentina and Uruguay. 

Well, I just haaaaaad to try it out. 

Faina is ground-up chickpeas (ie, chick pea flour) and the mere mention of it had me a tad curious -- especially since its healthy! I got out my blender and ground some dried chickpeas we had into a fine powder. Word of caution, its SUPER LOUD! I seriously had to cover my ears so I wouldn't lose my hearing. 

I decided to make a few batches of pizza since we were having our family over. Here's what you'll need. 

Recipe for pizza dough (I like Bobby Flay's): 

Ingredients

3 1/2 to 4 cups bread flour, plus more for rolling (Chef's Note: Using bread flour will give you a much crisper crust. If you can't find bread flour, you can substitute it with all-purpose flour which will give you a chewier crust.)
1 teaspoon sugar
1 envelope instant dry yeast
2 teaspoons kosher salt
1 1/2 cups water, 110 degrees F
2 tablespoons olive oil, plus 2 teaspoons

Directions

Combine the bread flour, sugar, yeast and kosher salt in the bowl of a stand mixer and combine. While the mixer is running, add the water and 2 tablespoons of the oil and beat until the dough forms into a ball. If the dough is sticky, add additional flour, 1 tablespoon at a time, until the dough comes together in a solid ball. If the dough is too dry, add additional water, 1 tablespoon at a time. Scrape the dough onto a lightly floured surface and gently knead into a smooth, firm ball.

Grease a large bowl with the remaining 2 teaspoons olive oil, add the dough, cover the bowl with plastic wrap and put it in a warm area to let it double in size, about 1 hour. Turn the dough out onto a lightly floured surface and divide it into 2 equal pieces. Cover each with a clean kitchen towel or plastic wrap and let them rest for 10 minutes.

*Faina recipe below

(As for the sauce, I sauteed a can of diced tomatoes -- discarded the juice -- and chopped an onion and some garlic). 


Started the dough

Allowed it to sit and rise

Stretched it out on the pan

Rolled another using my Anthropologie roller (thanks to my awesome sister!)

....and rolled, and rolled, and rolled, and you get the point

Faina recipe:


Ingredients:


    • 2 1/2 cups garbanzo bean flour

    • 1 teaspoon salt

    • 7 tablespoons olive oil

    • 2 tablespoons parmesan cheese (optional)

    • Freshly ground black pepper

    • 2-2 1/2 cups water

Preparation:


    1. In a medium bowl, whisk the garbanzo bean flour together with the salt, 3 tablespoons of the olive oil, the Parmesan cheese, and a generous amount of ground black pepper. 


    1. Whisk in 1 3/4 cups of water until the mixture is well blanded. Set batter aside for about a half hour, to let the garbanzo flour absorb some of the water. 


    1. Preheat the oven to 450 degrees. When it is hot, place the remaining 4 tablespoons of olive oil in a 12 inch pizza pan. Heat the pan in the oven until very hot. 


    1. Gradually stir remaining water into the batter mixture until it is thin enough to pour. Remove the hot pizza pan from oven, and immediately pour the batter into the pan. The batter should make a thin (about 1/4 inch) layer. Place the pan back in the oven and bake until fainá is golden and crispy (about 8-10 minutes). 


    1. Cut the faina into pieces and serve.


Here's the Faina!
Faina, which I cut with a pizza roller

The (almost) finished product


Added it onto the pizza

A mini sandwich

We ate our caballo and rode off into the sunset.
At the end of the day, my sister and brother in law LOVED the finished product! We all loved the little 'sandwich' that was created with the faina on top. It was a treat in every bite and will have your guests talking about what an awesome slice they've just had! Not only is it unique, but also adds some protein and fills you up pretty quickly. Instead of topping a pizza with pepperoni, I encourage you to try some faina. 

I'd love to know what y'all think! 

Monday, July 22, 2013

Kitchen Makeover

The first key to ANY makeover is choosing color. It took me nearly two years to pick a paint color for our kitchen cabinets, and I'm totally underestimating. I kid you not, I spent many sleepless nights thinking about that. I know, I seriously need a life.

Clockwise (the large painted areas only): Gray Owl, Silver Spoon, Nimbus
Gray Owl, Silver Spoon, Nimbus -- all the way left is Moonshine
Here is Gray Owl at top, yet again, Gray Beard on bottom

You see, when I was preggers in the fall nothing seemed more cozy to me than having a kitchen the color of pie crust. Having went to Lowe's and picked out a random color, blindly, I ended up really not liking it the moment it debuted on our walls. Poor husband spent so much time painting it! The good thing is that he didn't like it either, so it bodes well for my agenda wanting a change this time around.

Left: Gray Owl
Middle: Nimbus
Right & Bottom: Moonshine

Not only were our walls an icky color, but they were super shiny -- no thanks to my choice on finish; I blame the hormones.

Left: Gray Owl
Right: Moonshine

Another Gray Owl

Now, with hormones and "nesting" having subsided, my intention is to give our space a light and airy feel. I'm loving the color of gray and think it will play nicely against white cabinets and our soon-to-come bead board wallpaper.

Gray Owl, top left
Trying to get every light to gauge these grays

Gray is tricky. There are undertones that come to life given certain light or come out simply because of other colors in the room. I never make anything easy, and our kitchen is no exception. Having obsessed mulled over colors, I've narrowed down my starting line-up.

Sample of Gray Owl
My brain was on overload with all these colors!

Here are the major players:

Gray Owl -- Benjamin Moore
Moonshine -- BM
Nimbus -- BM
Gray Beard -- Olympic
Silver Spoon -- Olympic

The verdict?

Gray Owl -- Looking nice, but I see an undertone of blue
Moonshine -- Another nice one, but reads too light with green undertones
Nimbus -- Way too 'rainy day' gray and depressing for the space
Gray Beard -- Too light with purple undertones
Silver Spoon -- Just too purple!

So, there you have it folks... I could go on and on, but I limited myself to only these colors. The winner is in here somewhere. I know it!